Last Christmas, I brought this corn casserole to Christina’s family dinner. Fourteen people, a table buckling under roast pork, three kinds of salad, stuffed peppers, the works. I honestly thought nobody would even notice the casserole sitting at the end of the table next to the bread basket.
It was the first dish gone. Not the pork. Not the peppers. The corn casserole.
Christina’s uncle Dragan, who has never once complimented my cooking in six years, came back for thirds and asked me for the recipe. I told him it was five ingredients and took ten minutes to throw together. He didn’t believe me. But that’s the thing about this recipe. It’s almost suspiciously easy. You dump everything in a bowl, stir, bake, done. No fancy technique, no long ingredient list, no stress. Just a creamy, golden, slightly sweet side dish that people won’t stop eating.
Why This One Works
There are a lot of corn casserole recipes out there, and most of them are basically the same. But the ratio here is what makes this version better than the rest. The combination of creamed corn and whole kernel corn gives you two different textures in every bite. Creamy and smooth from the creamed corn, little pops of sweetness from the whole kernels. And the Jiffy mix holds everything together without making it taste like dry cornbread.
One thing I learned the hard way: use full-fat sour cream, not light. I tried the light version once thinking it wouldn’t matter. It did. The casserole came out drier and didn’t have that rich, almost custardy texture in the middle. Full-fat is the move here. It’s not the time to cut corners.
The butter is doing real work too. Half a cup sounds like a lot, but it’s what gives the edges that golden, almost caramelized crust. You’ll understand the first time you scrape the side of the pan.
Ingredients
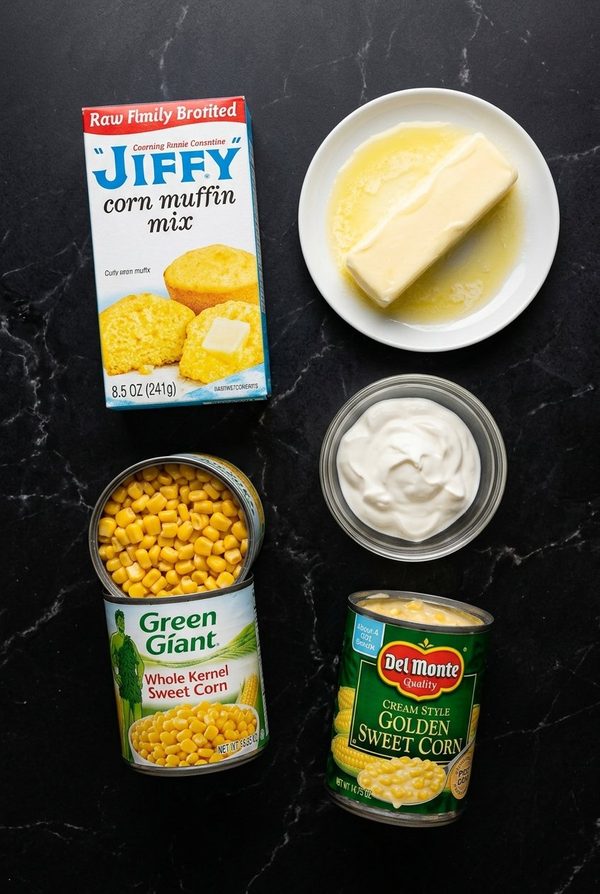
- 1/2 cup melted butter
- 1 can (14.75 oz) creamed corn
- 1 can (15.25 oz) whole kernel corn, drained
- 1 box Jiffy cornbread mix
- 1 1/4 cups sour cream
That’s it. Five ingredients. You probably have most of them already.
How to Make It
1. Preheat and prep your dish.
Set your oven to 350°F (175°C). Grab a 9×13 baking dish and grease it with butter or cooking spray. I prefer butter because it adds a little extra flavor to the edges, but spray works fine if that’s what you have.
2. Melt the butter and combine the wet ingredients.
Melt the half cup of butter in the microwave or a small saucepan. Pour it into a large mixing bowl. Add the entire can of creamed corn (don’t drain this one) and the drained whole kernel corn. Stir everything together until the butter is evenly mixed through. You want the corn swimming in that butter.
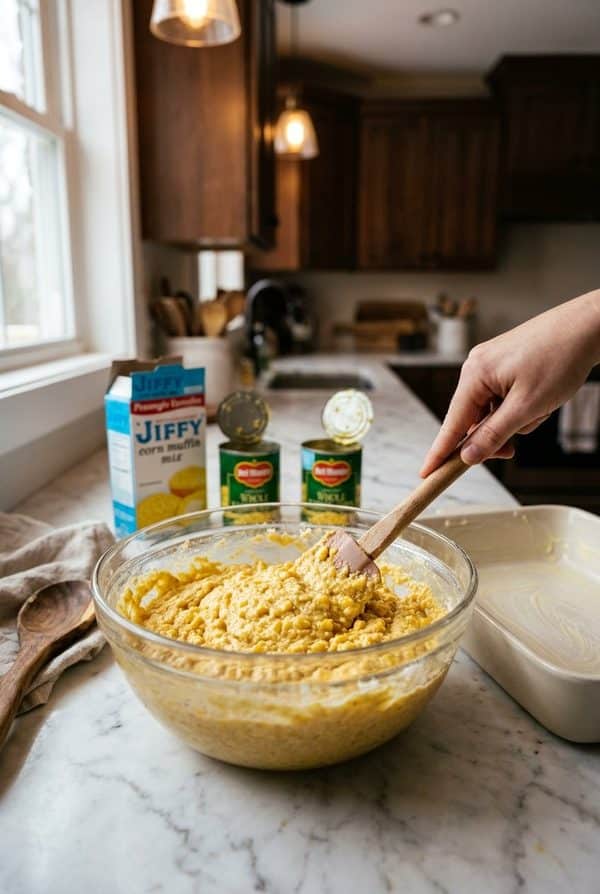
3. Add the Jiffy mix.
Dump in the whole box of Jiffy cornbread mix and stir until it’s just combined. You might see some small dry clumps. That’s okay. Don’t beat this like you’re making cake batter. Overmixing makes the casserole tough and dense instead of fluffy. A few streaks of dry mix are better than overworking it.
4. Fold in the sour cream.
Add the sour cream and fold it in gently with a spatula. You want it distributed evenly, but again, don’t go overboard with the mixing. The batter should look thick, slightly lumpy, and a pale golden color. If it looks perfectly smooth, you’ve probably mixed too much.
5. Pour into the dish and spread it out.
Pour the batter into your greased baking dish. Use the spatula to spread it into the corners and even out the top. It doesn’t need to be perfect. A few uneven spots actually give you more crispy edges, which is a good thing.
6. Bake until golden.
Slide the dish into the middle rack of your oven. Bake for 45-55 minutes. You’re looking for the top to turn a deep golden brown. The edges should be pulling away slightly from the sides of the dish. Stick a toothpick in the center. If it comes out mostly clean with just a few moist crumbs, it’s done. If there’s wet batter on the toothpick, give it another 5 minutes.
7. Let it rest before serving.
This is the step most people skip, and it matters. Let the casserole sit for at least 10 minutes after you pull it from the oven. It firms up as it cools, and the center sets properly. If you cut into it right away, it’ll fall apart on the spoon. Ten minutes of patience makes a real difference.
The edges get this buttery, crispy thing going on that honestly might be the best part. The middle stays soft and creamy. It’s the contrast that makes it work.
One tip: if you want an extra crispy top, turn on the broiler for the last 2-3 minutes. Watch it closely though. It goes from golden to burned in about 30 seconds under a broiler.
Storage and Leftovers

Keep leftovers covered in the fridge for up to 4 days. Reheat individual portions in the microwave, or put the whole dish back in the oven at 325°F for 10-15 minutes. It won’t be quite as crispy on top the second time around, but the inside stays just as good. You can freeze it too, tightly wrapped, for about 2 months. Thaw overnight in the fridge before reheating.
Honestly, I think it’s almost better the next day. The flavors settle in and the texture firms up just enough (don’t skip the reheat in the oven if you have the time).
Make It Your Own
This casserole is a blank canvas if you want to play around with it. I’ve thrown in about a cup of shredded cheddar cheese before baking, and it turns into something almost like a cheesy cornbread pudding (ridiculous, in the best way). You can also dice up some jalapeños and fold them in with the sour cream if you want a little kick. For a more savory version, try crumbling cooked bacon on top during the last ten minutes of baking. It works with pretty much anything you add to it, which is why I keep coming back to this recipe.
If you’re into easy casseroles, you should also check out my Butternut Squash Casserole or this Pineapple Casserole that’s weirdly addictive. And if you need a breakfast option, the French Toast Casserole is another crowd favorite in our house.
Common Questions
Can I make this ahead of time?
You can assemble the whole thing and keep it covered in the fridge for up to 24 hours before baking. Just add about 5-10 extra minutes to the bake time since it’s going in cold. The texture comes out the same.
What if I can’t find Jiffy mix?
Any cornbread mix works. Martha White and Krusteaz both make 8.5 oz boxes that are basically the same thing. If you can only find a bigger box, measure out about a cup and a quarter of the dry mix and you’ll be close enough.
Can I double this recipe?
I’ve done it plenty of times for bigger gatherings. Use two 9×13 dishes instead of one giant pan, or it won’t cook evenly in the middle. Everything else just doubles straight across.
Recipe Card
5-Ingredient Jiffy Corn Casserole
Ingredients:
- 1/2 cup melted butter
- 1 can (14.75 oz) creamed corn
- 1 can (15.25 oz) whole kernel corn, drained
- 1 box Jiffy cornbread mix
- 1 1/4 cups sour cream
Instructions:
- Preheat oven to 350°F. Grease a 9×13 baking dish.
- Mix melted butter, creamed corn, and drained whole kernel corn in a large bowl.
- Stir in the Jiffy cornbread mix until combined.
- Fold in sour cream. Don’t overmix.
- Pour into prepared dish.
- Bake 45-55 minutes until golden and set in the center. Cool 10 minutes before serving.
I’ve made this casserole dozens of times now and it hasn’t failed me once. Holidays, potlucks, random Tuesday nights when I don’t feel like trying. It just works. If you’re looking for a side dish that takes no effort but gets all the compliments, this is the one. Trust me on that.
Have made this many time for holidays . Absolutely fantastic dish