The first Thanksgiving I hosted at our place, I was absolutely terrified. Not of the turkey. Not of the timing. I was terrified of the side dishes. Alex’s mom makes this butternut squash casserole every single year, and his whole family treats it like the centerpiece of the meal. The turkey is just there. The casserole is the event.
So naturally, I decided I’d make it myself. She’d given me the recipe on a sticky note months earlier, and I’d stuck it to the fridge where it slowly collected grease stains until the measurements were barely readable. I remember standing in the kitchen that Wednesday night, peeling what felt like an endless amount of squash, the counter covered in orange goop, and thinking I’d made a huge mistake. My daughter was “helping” by lining up squash seeds on the table like little soldiers.
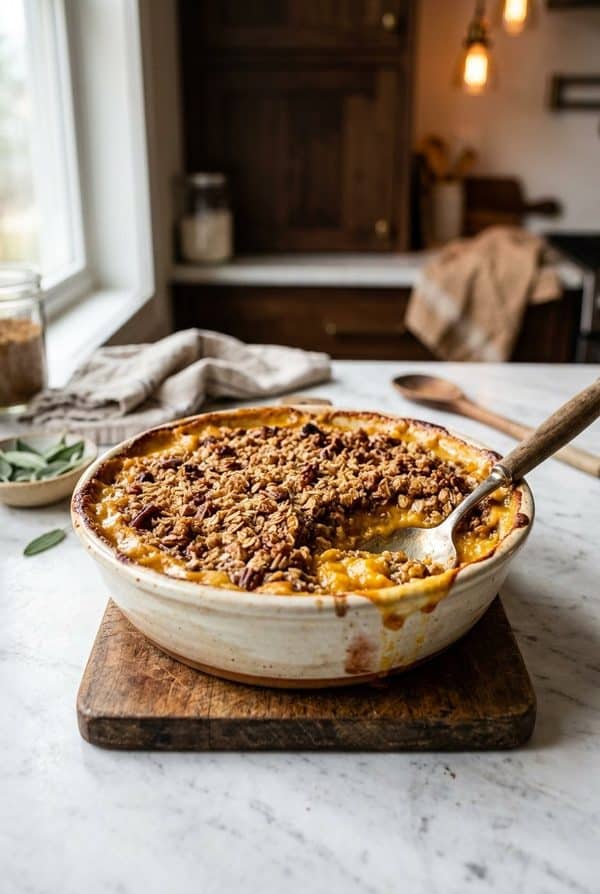
But when that casserole came out of the oven the next day, golden and bubbling with that sweet crumb topping, I just stood there staring at it. It smelled like cinnamon and brown butter and everything good about November. Alex’s mom took one bite, looked at me, and said, “This is better than mine.” She was being generous. But it was close. And that was enough.
I’ve made it every fall and winter since. It’s the dish I bring to potlucks, the one I make when someone has a baby or a bad week. It’s not complicated. It just tastes like you spent way more time on it than you actually did.

A Few Things Before You Start
The squash is the whole foundation here, so you want to get that part right. Buy a butternut squash that feels heavy for its size and has a matte skin, not shiny. Shiny means it was picked too early. If you absolutely hate peeling squash (and honestly, who loves it), you can buy the pre-cut cubes from the grocery store. No judgment. I’ve done it on busy weeks and nobody could tell the difference.
You’re going to boil the squash until it’s fork-tender, then mash it. How smooth you mash it determines the entire texture of your casserole. I go pretty smooth with just a few small chunks left, because I like a creamy bite with the occasional surprise. But if you want it completely silky, use a hand mixer or even a food processor.
One more thing. The topping is what makes this a casserole and not just mashed squash in a pan. Cornflakes give you the best crunch, but I’ve used panko breadcrumbs plenty of times and it works great. Pecans chopped up small are another option if you want something a little more grown-up. Just pick one and commit.
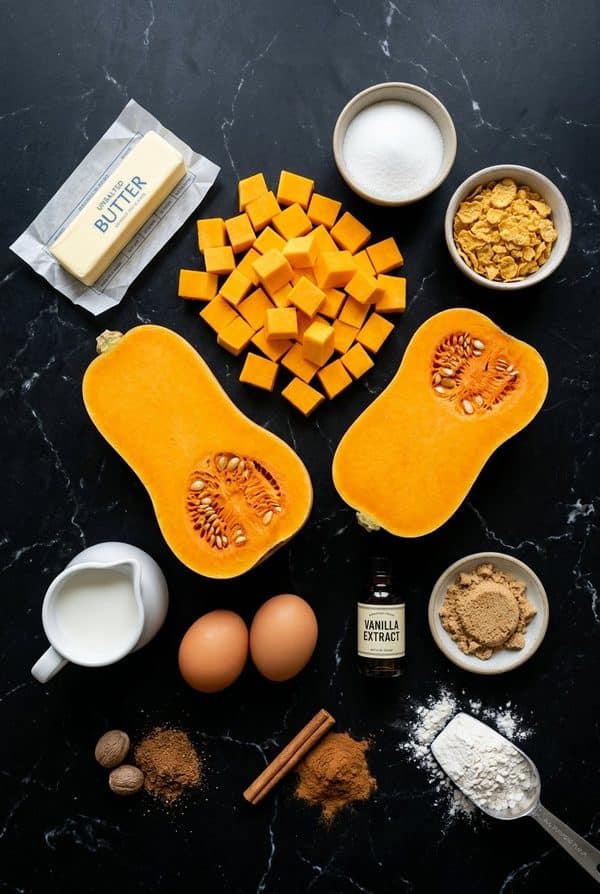
Ingredients
| Ingredient | Amount | Notes |
|---|---|---|
| Butternut squash, peeled and cubed | 3 lbs | About 1 large squash |
| Butter, melted | 1/2 cup | For the filling |
| White sugar | 1/2 cup | Maple syrup works as a swap |
| Eggs, beaten | 3 | Room temperature is best |
| Whole milk | 1 1/2 cups | 2% is fine in a pinch |
| All-purpose flour | 2-3 tablespoons | Helps set the filling |
| Vanilla extract | 1 teaspoon | Real vanilla, not imitation |
| Ground cinnamon | 1/2 teaspoon | |
| Ground nutmeg | 1/4 teaspoon | Freshly grated if you have it |
| Salt | 1/4 teaspoon | |
| For the topping: | ||
| Light brown sugar | 1/2 cup | Packed |
| Crushed cornflakes or breadcrumbs | 1/2 cup | Panko or chopped pecans also work |
| Butter, melted | 1/4 cup |
The Method
Step 1: Cook and mash the squash.
Preheat your oven to 350F (175C). Bring a big pot of salted water to a rolling boil. Drop in your cubed squash and let it cook for 10 to 15 minutes. You want it soft enough that a fork slides through with zero resistance. Not almost tender. Actually tender. This matters because if you undercook it, you’ll end up fighting lumps when you try to mash, and those lumps won’t magically disappear in the oven.
Drain the squash well. And I mean really well. Tip the colander a few times and let it sit there for a couple minutes. Excess water is the enemy of a creamy casserole. It’ll make the filling watery and loose, and nobody wants that. Once it’s drained, transfer it to a large bowl and mash it with a potato masher or a fork until it’s the consistency you want. I spend about two minutes on this, going for mostly smooth with a few small pieces still visible.
Step 2: Build the filling.
Add the melted butter to the mashed squash and stir it in. Then add the sugar, beaten eggs, milk, flour, vanilla, cinnamon, nutmeg, and salt. Stir everything together until it’s evenly combined. The mixture should look like a thick, pourable custard. If it seems really stiff, your squash might have been a drier one, so add a splash more milk. If it looks too runny, add another half tablespoon of flour.
This is the part where your kitchen starts smelling incredible, by the way. The cinnamon and vanilla hit the warm squash and it’s just this gorgeous fall scent that makes you want to eat the filling raw. Don’t. There are raw eggs in there. But I understand the temptation.
Step 3: Get it into the baking dish.
Grease a 9×13-inch baking dish with butter or cooking spray. Pour the squash mixture in and spread it out evenly with a spatula. Take your time here. You want a level surface so the topping distributes evenly and everything bakes at the same rate. Push the mixture into the corners and smooth the top.
Step 4: Make the crumb topping.
In a separate bowl, combine the brown sugar, crushed cornflakes (or whatever you’re using), and the melted butter. Toss it together with a fork until everything is coated and crumbly. It should clump slightly when you squeeze it but still feel loose. This topping is what gives the casserole that contrast between the soft, sweet filling and the crunchy, caramelized top. It’s my favorite part and honestly the reason I’d pick this over plain mashed butternut squash any day.
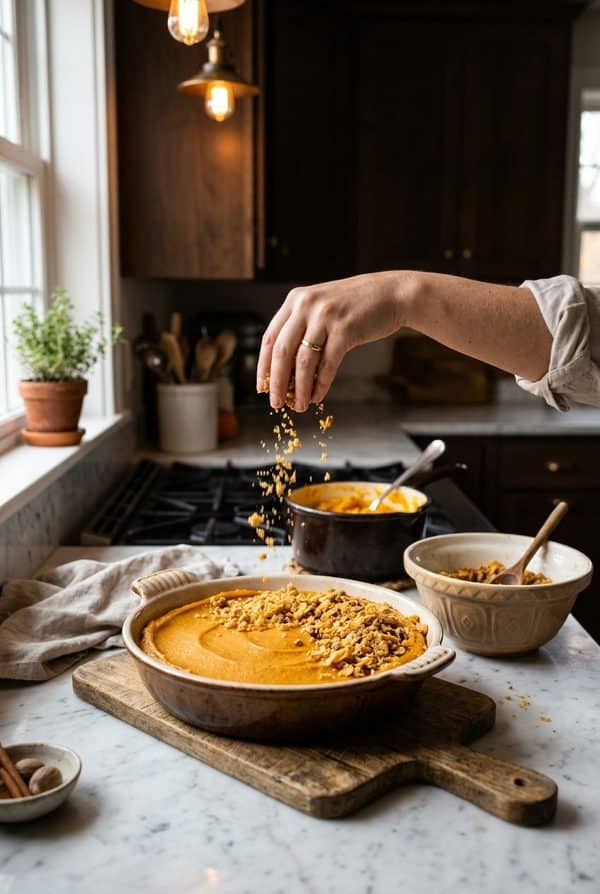
Step 5: Top and bake.
Scatter the crumb topping evenly over the squash filling. Don’t press it down. Just let it sit on top in a loose layer so air can circulate and help it crisp up. Slide the dish into the oven and bake for 30 to 40 minutes. You’re looking for a golden brown top with slightly darker edges, and the filling should be set. It’ll still jiggle just slightly in the center when you tap the dish, but it shouldn’t look liquid. If your topping is browning too fast, tent a piece of foil over it for the last 10 minutes.
Pull it out and let it sit for at least five minutes before serving. The filling firms up as it cools and the flavors settle together. I know it’s hard to wait when it smells that good.
This casserole pairs perfectly with holiday mains like roasted turkey or glazed ham, but it’s also wonderful as part of a casserole spread. If you’re building a holiday table, my Jiffy Corn Casserole is another crowd favorite that takes about five minutes to throw together, and the Pineapple Casserole brings a sweet and tangy contrast that works really well alongside the butternut squash.
Leftovers and Reheating
This keeps in the fridge for up to 4 days in an airtight container. Reheat it in the oven at 350F covered with foil for 20 to 25 minutes. The microwave works for single servings, about 1 to 2 minutes on medium power, but you’ll lose some of that topping crunch.
It freezes well for up to 3 months. My tip: freeze it without the topping and make a fresh batch of the crumb mixture when you’re ready to reheat. Takes two minutes and the difference in texture is worth it. Thaw overnight in the fridge before reheating.
Recipe Card
Butternut Squash Casserole
A creamy, cinnamon-spiced butternut squash filling with a crunchy brown sugar crumb topping. The ultimate holiday side dish.
- Prep Time: 20 minutes
- Cook Time: 40 minutes
- Total Time: 60 minutes
- Servings: 8-10
- Calories per serving: ~280
Ingredients
For the casserole:
- 3 lbs butternut squash, peeled, seeded, and cubed
- 1/2 cup butter, melted
- 1/2 cup white sugar
- 3 eggs, beaten
- 1 1/2 cups whole milk
- 2-3 tablespoons all-purpose flour
- 1 teaspoon vanilla extract
- 1/2 teaspoon ground cinnamon
- 1/4 teaspoon ground nutmeg
- 1/4 teaspoon salt
For the topping:
- 1/2 cup light brown sugar
- 1/2 cup crushed cornflakes or breadcrumbs
- 1/4 cup melted butter
Instructions
- Preheat oven to 350F (175C). Boil cubed butternut squash in salted water for 10-15 minutes until fork-tender. Drain well and mash to desired smoothness.
- Mix mashed squash with melted butter, sugar, eggs, milk, flour, vanilla, cinnamon, nutmeg, and salt until smooth and custard-like.
- Pour into a greased 9×13-inch baking dish and spread evenly.
- Combine brown sugar, crushed cornflakes, and melted butter in a separate bowl until crumbly.
- Scatter topping over the squash mixture without pressing down.
- Bake 30-40 minutes until golden brown on top and filling is set.
- Rest 5 minutes before serving.
Nutrition (per serving)
| Calories | ~280 |
|---|---|
| Servings | 8-10 |
FAQ
Can I use canned butternut squash instead of fresh?
You can, and it saves a ton of time. You’ll need about two 15-oz cans. Just drain them well and skip the boiling step. The texture is slightly different but it still tastes great. I’ve done it when I was short on time and my family didn’t notice.
What if I don’t have cornflakes for the topping?
Panko breadcrumbs are my go-to swap. Chopped pecans or walnuts work too and add a really nice nutty flavor. Regular breadcrumbs are fine but they won’t get quite as crispy. Graham cracker crumbs are a wild card option that actually tastes amazing if you want to lean into the sweet side.
Can I make this the day before?
Absolutely. Assemble the whole thing, cover it tightly with plastic wrap, and refrigerate. When you’re ready, just add the topping and bake. You might need an extra 5 to 10 minutes of oven time since it’s going in cold. This is what I do every Thanksgiving now so the morning isn’t so chaotic.
I still think about that first Thanksgiving every time I make this. The sticky note is long gone, but the recipe lives in my head now like a reflex. Peel, boil, mash, mix, top, bake. My daughter’s old enough to help with the topping now, and she’s very serious about getting an even layer. She tells me if it’s not even enough. Tough critic.
If you’re putting together a holiday spread and want that same cozy energy running through the whole table, the French Toast Casserole is another one I keep coming back to for brunches and lazy weekend mornings. Different vibe, same warm-hug feeling.
Make this one for your next family dinner. It’ll earn its spot on the table.