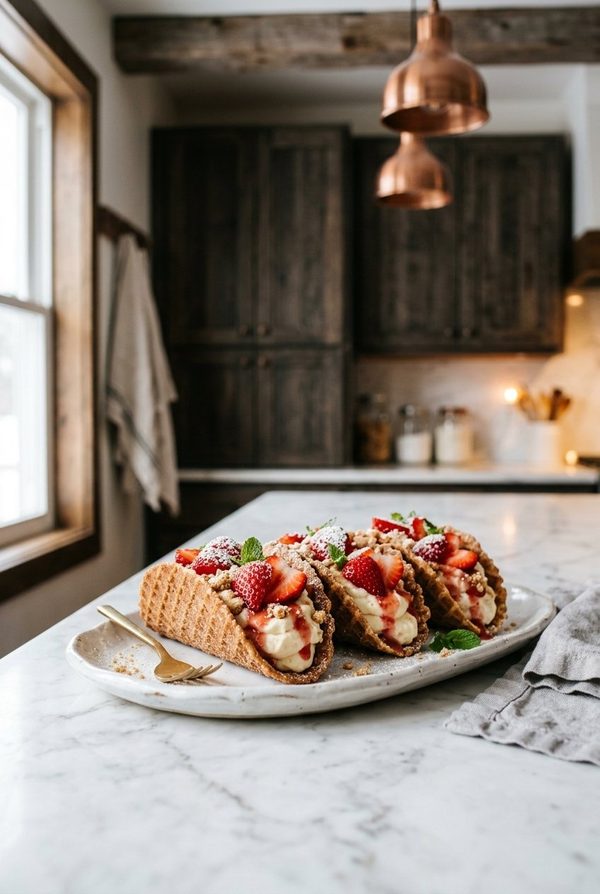
I almost didn’t bring these to my friend’s birthday party. I’d made them the night before as a test run, decided they were “good enough,” and honestly didn’t think much of it. I figured I’d bring them alongside the cake and they’d quietly sit on the dessert table. Instead, they were gone in under ten minutes. People kept circling back asking if there were more. My friend’s husband ate three before I even got one. The thing is, these strawberry cheesecake tacos look impressive but they’re genuinely one of the easier desserts I’ve ever pulled together. Crispy graham-coated shells, a fluffy no-bake cheesecake filling, glossy strawberries on top. The shortcut here is the tortilla shell — it does all the work.
Ingredients
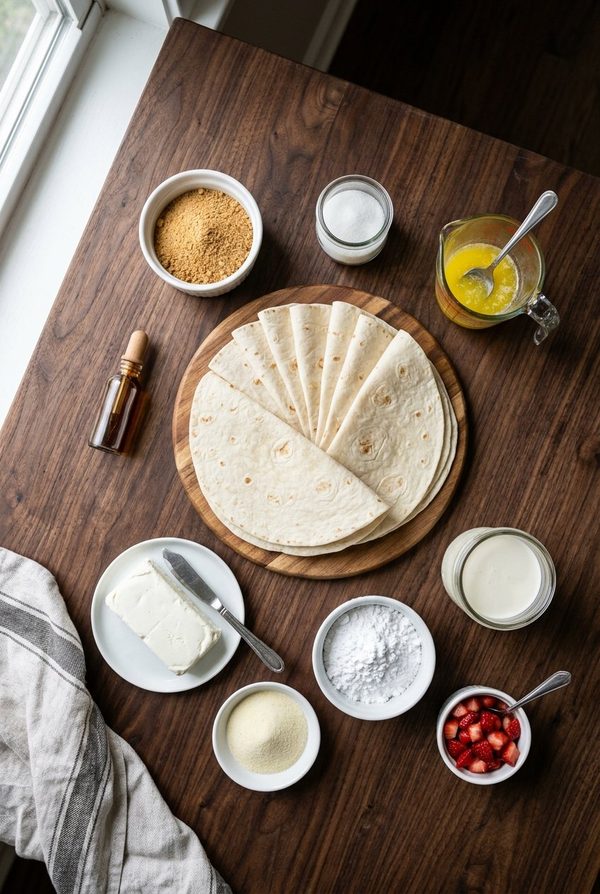
For the Shells:
- 9-inch flour tortillas (you’ll cut circles from them)
- 1 cup graham cracker crumbs
- 2 tablespoons granulated sugar
- 1/3 cup melted butter
For the Cheesecake Filling:
- 8 ounces cream cheese, room temperature
- 1 cup heavy whipping cream
- 1/2 cup powdered sugar
- 3 tablespoons cheesecake instant pudding mix
- 1 teaspoon vanilla extract
For the Topping:
- 1/2 cup chopped fresh strawberries
- 3/4 cup strawberry glaze
Instructions
1. Preheat your oven to 400°F (200°C).
Set an inverted cupcake pan on your counter. This is what you’ll drape the shells over to get that taco shape. You can also line a regular baking sheet with parchment if you want to prop them another way, but the cupcake pan trick is genuinely the easiest method I’ve found.
2. Make the crumb coating.
In a shallow dish, mix the graham cracker crumbs and granulated sugar together until evenly combined. This crumb mixture is what gives the shells their cheesecake-crust flavor, and it’s worth taking a second to get it mixed well so every shell gets an even coat. Set the dish aside where you can reach it easily.
3. Cut the tortilla circles.
Use a 3 3/4-inch round cookie cutter to cut three circles from each tortilla. If you don’t have a cookie cutter, a small bowl or jar lid works perfectly. You want the circles roughly the same size so they bake evenly and hold a consistent amount of filling. Cutting them uniform also makes the finished tacos look like you actually planned this, which is always a bonus.
4. Fork-poke each circle.
Before you coat anything, use a fork to poke small holes across both sides of each tortilla circle. This is a small step that matters a lot — it keeps the tortillas from puffing up into a bubble while they bake, which would make them nearly impossible to fill later. A few pokes on each side is all you need. Don’t skip it.
5. Butter and coat each circle.
Brush both sides of a tortilla circle with melted butter, then press it gently into the crumb mixture so the crumbs stick to both sides. The goal is an even, snug coating, not a thick crust. Work through all the circles this way. Take your time with this step because a well-coated shell is the difference between a crispy, flavorful taco and a plain, pale one.
6. Shape and bake the shells.
Fold each coated circle gently in half, then drape it over the ridge between two cups on the inverted cupcake pan. Space them with a little room between each one so the heat can circulate. Slide the pan into the oven and bake for 10 to 12 minutes. You’re looking for golden-brown edges and shells that feel firm when you lightly tap them. Watch closely in the last two minutes — they can go from perfect to too dark quickly.
7. Cool completely before touching them.
This part requires patience. Leave the shells on the inverted cupcake pan until they’re fully cooled. Moving them too soon will cause them to lose their shape. I usually get started on the filling while they cool, which works out timing-wise.
8. Whip the heavy cream.
In a large mixing bowl, whip the heavy cream until stiff peaks form. You want the cream fully whipped — not soft and droopy, actually stiff. This gives the filling its lightness and keeps it from being too dense inside the shells. Set the bowl aside.
9. Beat the cream cheese base.
In a separate bowl, beat together the softened cream cheese, powdered sugar, cheesecake pudding mix, and vanilla extract until completely smooth. No lumps. Room-temperature cream cheese is non-negotiable here — cold cream cheese will leave lumps that no amount of beating will fix. The pudding mix thickens the filling and deepens the cheesecake flavor in a way that’s worth the tiny extra ingredient.
10. Fold the two mixtures together.
Using a spatula, gently fold the whipped cream into the cream cheese base. Work in slow, wide strokes from the bottom of the bowl up. You want to keep as much air in the whipped cream as possible. Once it’s fully combined and you don’t see any white streaks, transfer the filling into a piping bag or a zip-top bag with one corner snipped off. This makes filling the shells much cleaner.
11. Mix the strawberry topping.
Toss the chopped strawberries with the strawberry glaze in a small bowl until every piece is coated. The glaze adds shine and a concentrated strawberry flavor that fresh berries alone don’t quite reach.
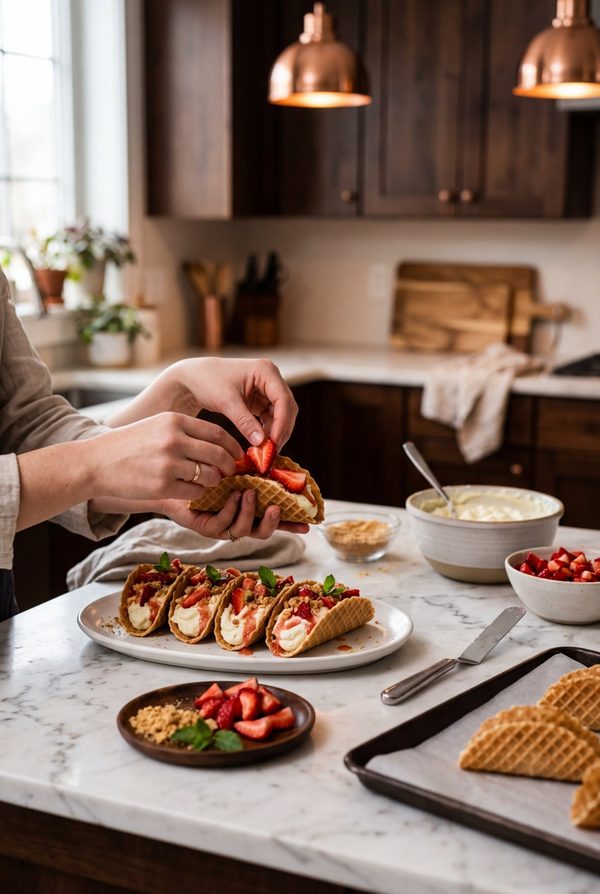
12. Fill and top the tacos.
Pipe the cheesecake filling into each cooled shell, filling them about three-quarters of the way. Leave a little room at the top so the strawberries don’t spill over. Spoon the glazed strawberries over the filling in each taco. For a finishing touch, sprinkle a pinch of extra graham cracker crumbs over the top. Serve immediately — the shells are at their best right after assembly.
Make It Your Own
If you want a chocolate version, swap regular graham cracker crumbs for chocolate graham crackers in the shell coating and drizzle the finished tacos with a little melted chocolate. The bittersweet chocolate against the sweet strawberry filling is genuinely excellent. For a berry medley version, skip the strawberry glaze entirely and top with a mix of fresh blueberries, raspberries, and sliced strawberries tossed in just a tablespoon of honey — it looks beautiful and the tartness balances the rich filling nicely. And if you need a lighter option, sugar-free pudding mix and powdered sweetener work well in the filling without changing the texture much, and you can use a reduced-sugar strawberry glaze for the topping.
Recipe Card
Strawberry Cheesecake Tacos
Prep Time: 25 minutes
Cook Time: 12 minutes
Cooling Time: 20 minutes
Total Time: ~1 hour
Servings: About 12 tacos
Shells:
- 9-inch flour tortillas
- 1 cup graham cracker crumbs
- 2 tablespoons granulated sugar
- 1/3 cup melted butter
Filling:
- 8 oz cream cheese, room temperature
- 1 cup heavy whipping cream
- 1/2 cup powdered sugar
- 3 tablespoons cheesecake instant pudding mix
- 1 teaspoon vanilla extract
Topping:
- 1/2 cup chopped fresh strawberries
- 3/4 cup strawberry glaze
Instructions:
- Preheat oven to 400°F. Set out an inverted cupcake pan.
- Mix graham cracker crumbs and sugar in a shallow dish. Set aside.
- Cut three 3 3/4-inch circles from each tortilla.
- Poke both sides of each circle with a fork to prevent puffing.
- Brush tortilla circles with melted butter, then press both sides into the crumb mixture.
- Fold each circle in half and drape over the ridges of the inverted cupcake pan. Bake 10-12 minutes until golden and crisp.
- Cool completely on pan.
- Whip heavy cream to stiff peaks. Set aside.
- Beat cream cheese, powdered sugar, pudding mix, and vanilla until smooth.
- Fold whipped cream into cream cheese mixture. Transfer to piping bag.
- Toss chopped strawberries with strawberry glaze.
- Pipe filling into cooled shells about 3/4 full. Top with glazed strawberries and a pinch of crumbs. Serve immediately.
Storage: Store shells and filling separately. Shells keep at room temperature in an airtight container up to 2 days. Filling keeps refrigerated up to 3 days. Assemble just before serving.
The best part about this recipe is that it looks like you spent way more time than you did. Nobody at that party believed me when I said it was tortillas holding the whole thing together. They kept asking what kind of pastry shell it was. I’ve since made these for a baby shower, a potluck, and a Tuesday night when I just wanted something nice. They work every time. If you’re into no-fuss desserts that still feel a little special, you might also like these no-bake peanut butter cookies or this easy french toast casserole for a crowd. And if you ever want to go the buttery shortbread route for a party spread, the Panera shortbread cookie recipe is worth bookmarking too.